Showing posts with label photoshop layers tutorial. Show all posts

Thursday, September 8, 2011

create a color palette

Hi!
These days have been a bit busy here!
Lately I have seen and admired those beautiful images which include a color palette. It adds to the photo. And I wanted to try myself.
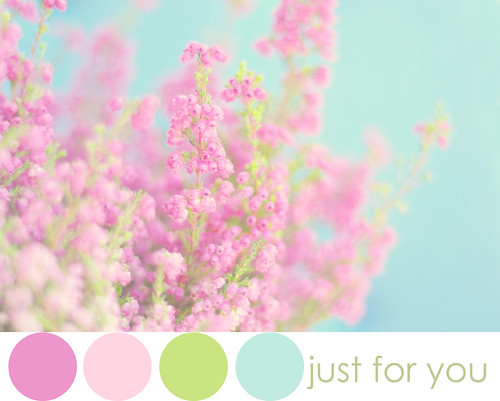
just for you
Yes, there are palette creators online, but none was exactly as flexible as I wanted.
So I started mine. And here is the steps I followed using Photoshop.

First I opened my original image in Photoshop. This is the photo:


We start changing the picture size, to make room for the palette. I wanted it to be at the bottom, but on the right side would be perfect too.


I added 5 centimetres of white space:


And there it is, the white band where i will put the colors.


Then I chose shapes to draw circles. The tool is ellipse; to make it circle just press shift key. Place the cross just in the croner of the white space to better situate the circle. Anyway, you can always move it using the move tool.


And there it is, first circle!


Now it is time to choose the color for this first circle. Click on the tiny scrren you have in the layers palette, on the right ot the workspace:


When you double click on that miniscreen, the color picker will open. When you move the pointer on your picture, it will change the color. Select the first.


Once you have created the first color circle, let's go on for the next ones. You can create othger shapes, but the easiest is to duplicate the layer.


Once we have the duplicated layer, move the circle with the move tool -first tool on the left.


Now you can change the color inside the circle as we did before: double click on the shape screen and pick color.


Create as many circles as you like.


Finally I added some text using the reamining white space.


PS: There's a beautiful tutorial by Christina Greve at Divas and Dreams:Click here, it's worth! Christina is such an artist! I admire her work oh so much!

Tuesday, September 15, 2009

Do you vignette?

Vignetting is a technique to add some drama to any shot. We usually think of vignetting as adding a black halo all around the shot,as if slightly framing it.
But vignetting can be done in white or any other color. The most usual, black.
I do vignette many of my photos. It adds an interest sometimes, or focuses the object, or even eliminates some disturbing elements!

The easiest way to vignette is, in Photoshop, using a filter. It is in filters > distort > Lens correction;
Then the menu for lens correction opens, you click on vignette and use the slide to go to black (left) or white (right) and also the amount of vignetting:


The result is this:


Not bad; but I usually want to have more control of the black space. Then I don't go to filters. What I do is the following:

First I create a new layer, then select the paint brush tool, but change the size to an exaggerated number, really big. Then paint just with the border, not the full brush; the center of the brush must be out of the border.


Now you control the areas where you want the shadow to appear. And this way, though the layer opacity, you control the amount of vignette;
Then, there's only the last step: flatten your image, through layers > flatten layers.


And here is the result:
P1170401
Hope you like it.
Anyway, experiment, try new techniques, duplicate layers, compare, play with blend options...
Thanks for reading.

Thursday, February 5, 2009

It's gonna be cold...

... not so cold as it was a few weeks ago, but ...


Do you want to see how temperature dropped dramatically? Keep on reading:

It all started in the kitchen:
In Photoshop, I extracted myself from the kitchen, using filter> extract.


Now the shape can be isolated. I copied it using the magic wand and inverting the selection.


Then pasted the shape on the other photo, the plastic window of my freezer drawers:


Then,flipped horizontally and the blending of layers. I chose multiply blending mode.


Added one more layer, to provide a bit of foggy atmosphere:


I am addicted to Gaussian blur, so I duplicated the layer with myself, and applied filter>blur>gaussian blur, and blended the layer in multiply too.


And finally, the frame: Select with rectagle, copy and paste on new layer, then fusion options, shadow and bisel.