Estoy haciendo una orla para los niños de la clase de mi hijo. Lo primero fué la plantilla. Busqué, pero no había nada que me gustara, así que me la he fabricado y aquí la subo por si a alguien le puede servir.
Ésta es para un grupo de 1 profe y 21 niños. Como es un PSD, se puede retocar para incluir lo que se necesite.
La plantilla tiene esta pinta:
Right now I'm working on a class group photograph for all the kids in my son's classroom. First I googled for templates, but I couldn't find one that was ok for me. So I built one and here it is, in case it could be useful for anyone to use. This one is for a group of 1 teacher and 21 students, but it is customizable, as it is a PSD file. The file looks like this:
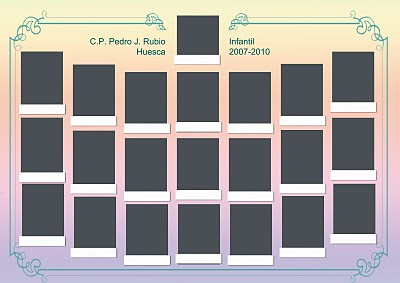
El proceso para incluir las fotos es sencillo. Se abre el archivo PSD en Photoshop, se abre la foto de cada niño, se copian por medio de seleccionar > copiar > pegar en el documento orla3, y luego Ctrl T para redimensionar. Se encoge hasta que se acople al tamaño del cuadrado gris. Una vez que estén todos redimensionados, se puede eliminar la capa con los cuadros grises. Luego acoplar imagen y guardar.
The process to include the photos is quite simple. Open the PSD file in Photoshop, open each kid's photo, copy via select > copy > paste in document orla3, then Ctrl T to resize. Make it smaller, so that it fits the grey box. Once you've done this with all the photos, you can delete the layer with the boxes. Then you can flatten the image.
El archivo tiene cinco capas: el fondo, el ornamento, los logos, las fotos y los nombres. Cada una de ellas se puede modificar a medida.
The file has got five layers: background color, ornament, logos, photographs and names. Each of these layers can be transformed as needed.
Para bajarte la plantilla haz click
aquí.
To Download PSD file click
here.
.JPG)
.JPG)
.JPG)
.JPG)
.JPG)
.JPG)


.JPG)


